The product or a prototype
Something people can actually use: a working prototype, a model, a pre-production sample or a clickable design.
AI-powered usability testing for product development
How it works
One product, followed through a full cycle. AI helps prepare the study and suggests findings; your team reviews both and makes the decisions. That’s what human-in-the-loop means in TestFlow.
Example study · fictional data
Goal
Start a project for a physical or a digital product. Write down the product, the people who will use it, where it will be used and the question the study has to answer. That question stays at the top of the plan.
“A self-service kiosk where commuters buy and top up transport tickets. We want to know if they can do it without help.”
Draft and review
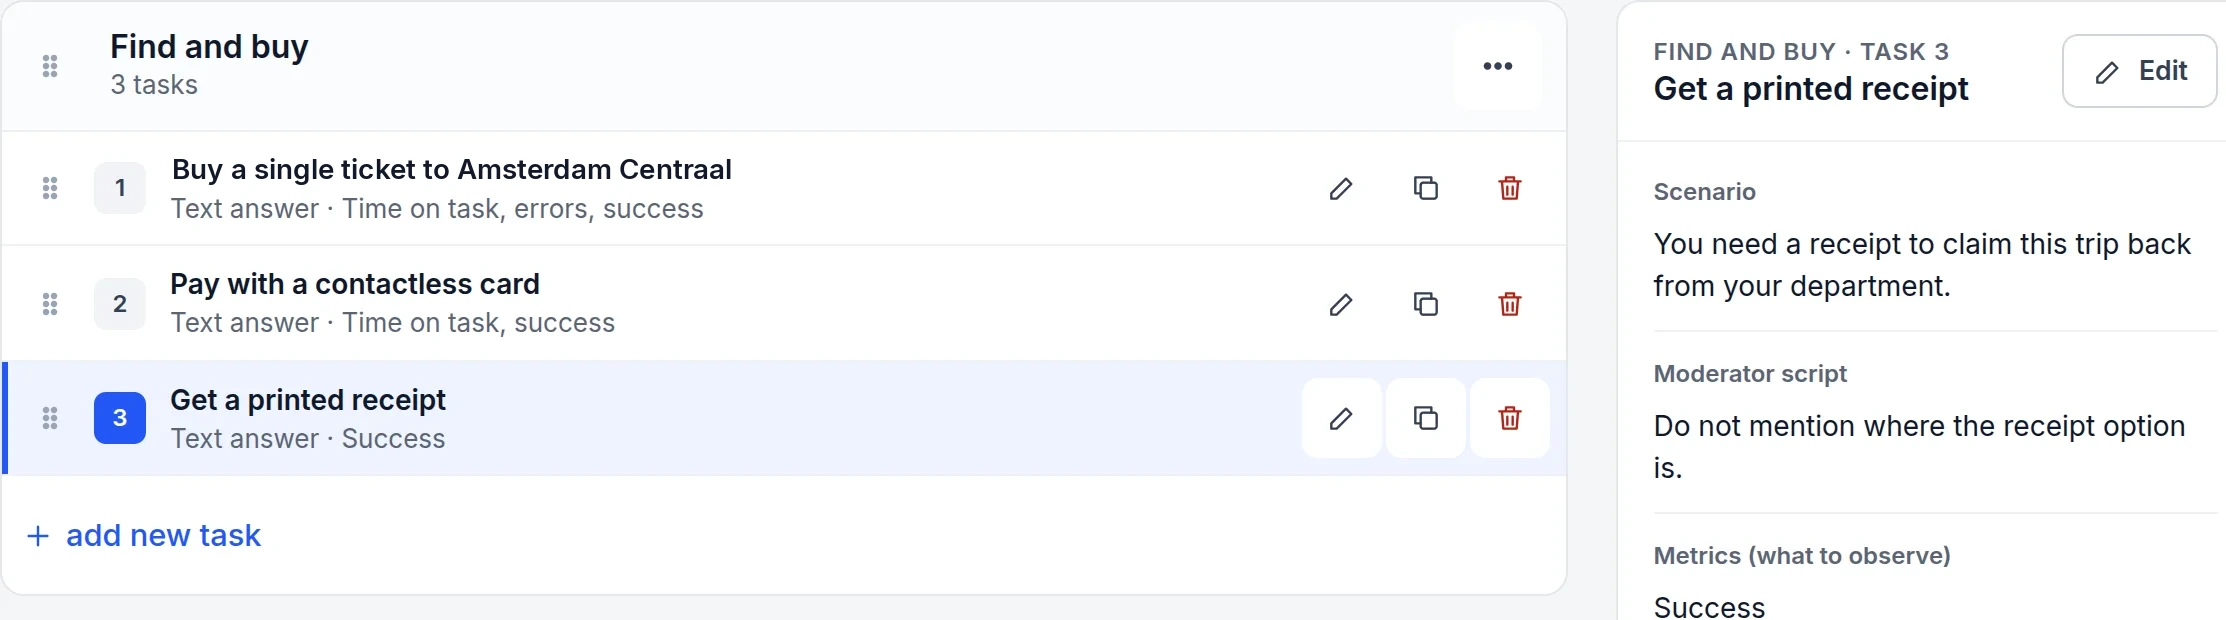
From your description, TestFlow drafts the objectives, task groups, scenarios, moderator scripts and questionnaire. You can also start from a template or import a study you already have. Nothing reaches a participant until your team has reviewed it.
What to check in the draft
Session
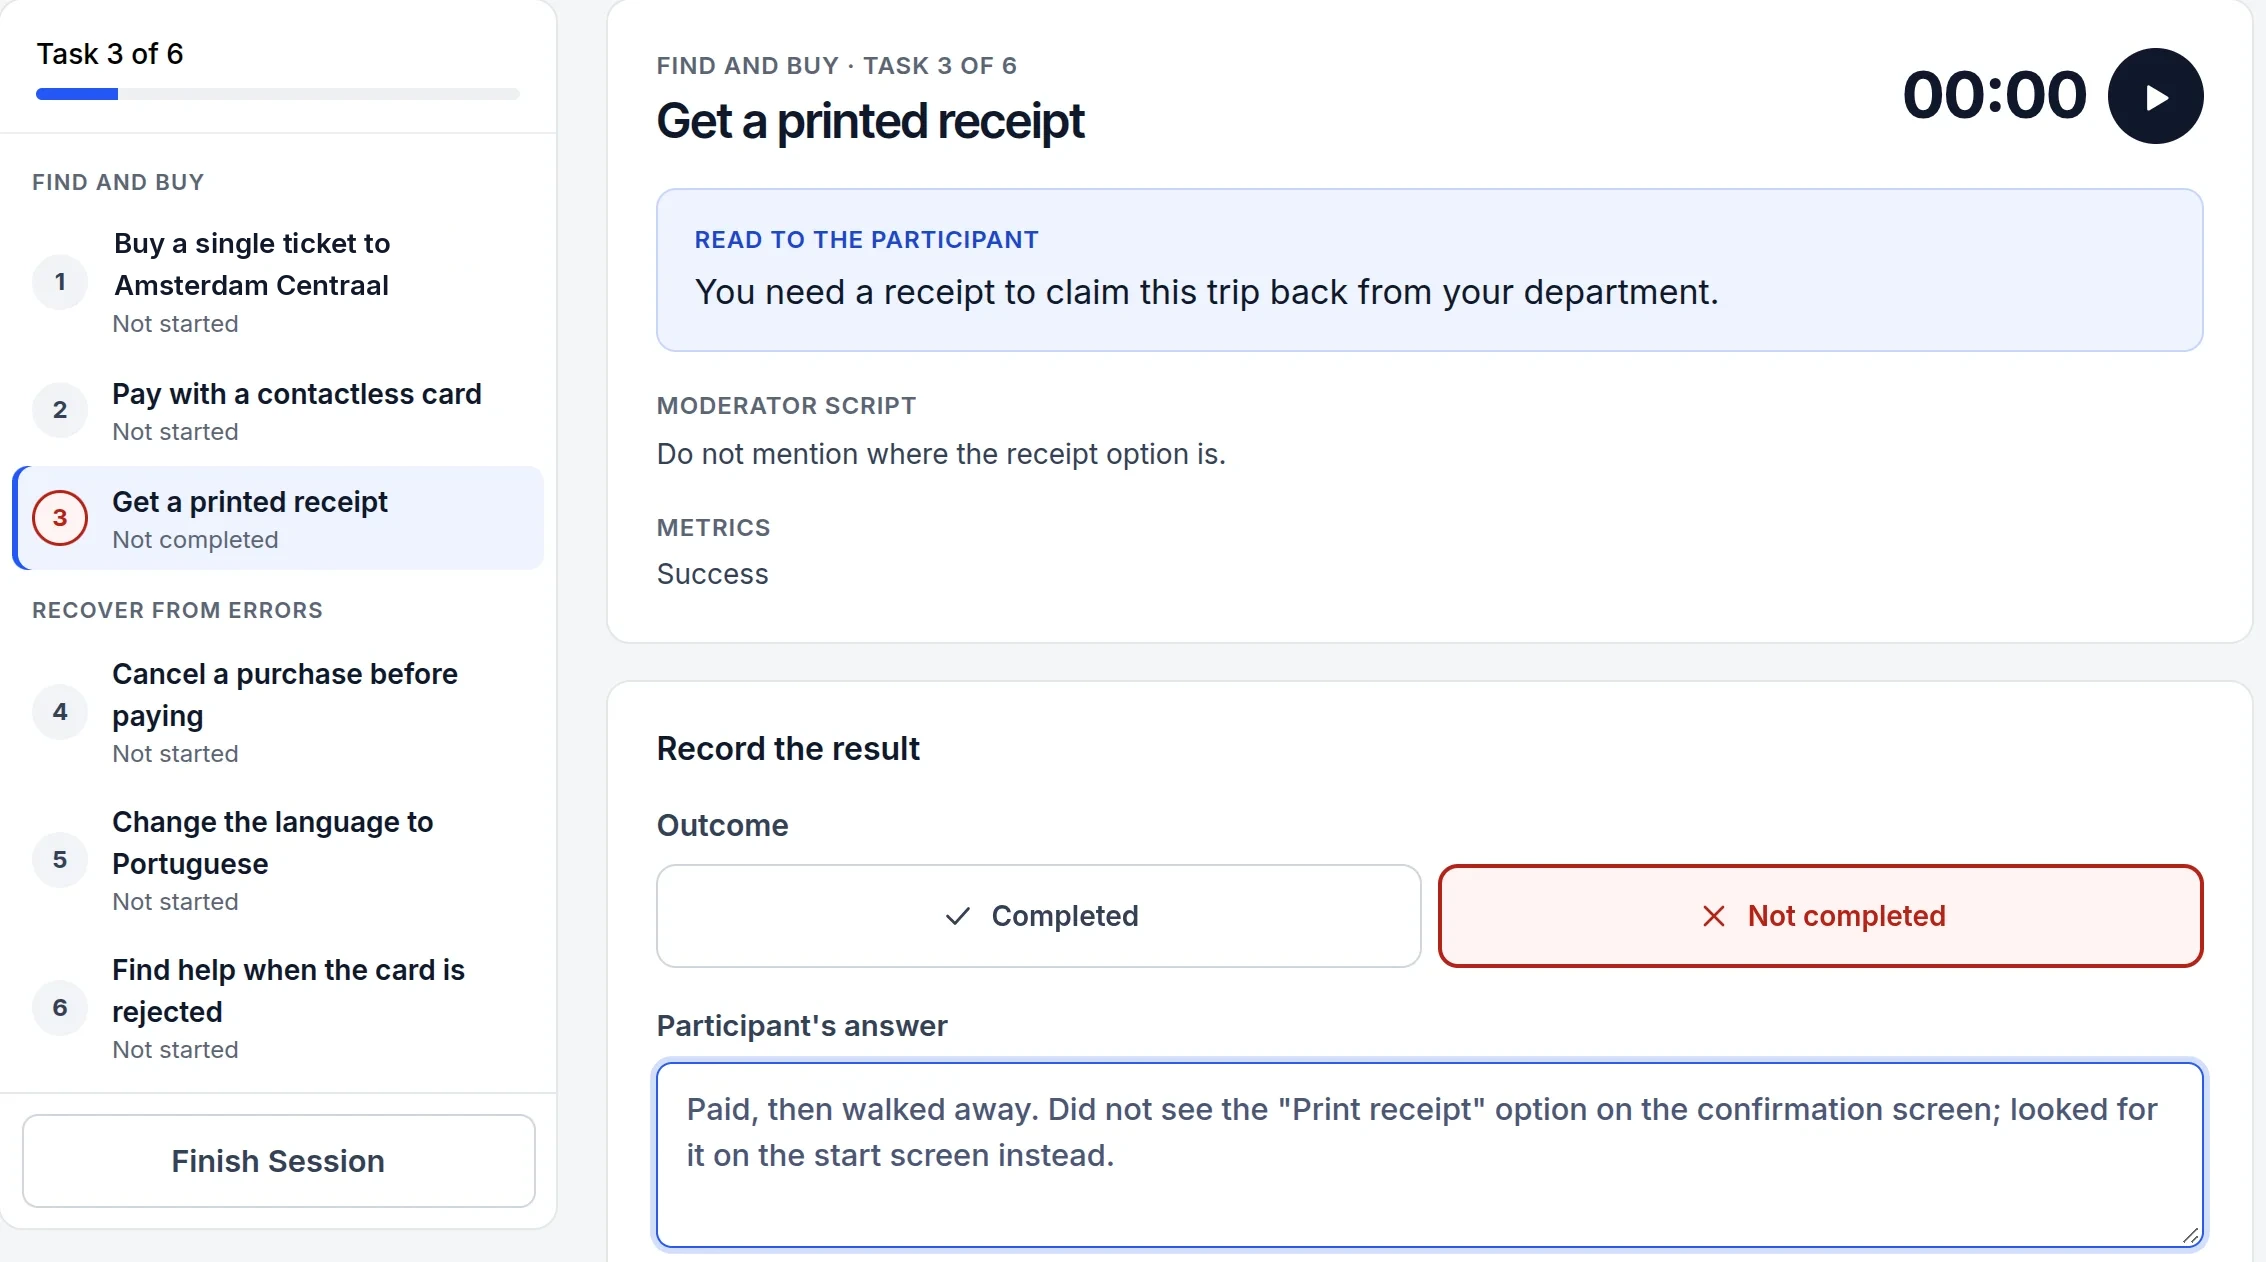
Add the participant and start the session. The moderator reads each scenario, times the task, records the outcome and notes what the participant says and does. Keep practice sessions separate from real ones, so they don’t count in the results.
Evidence
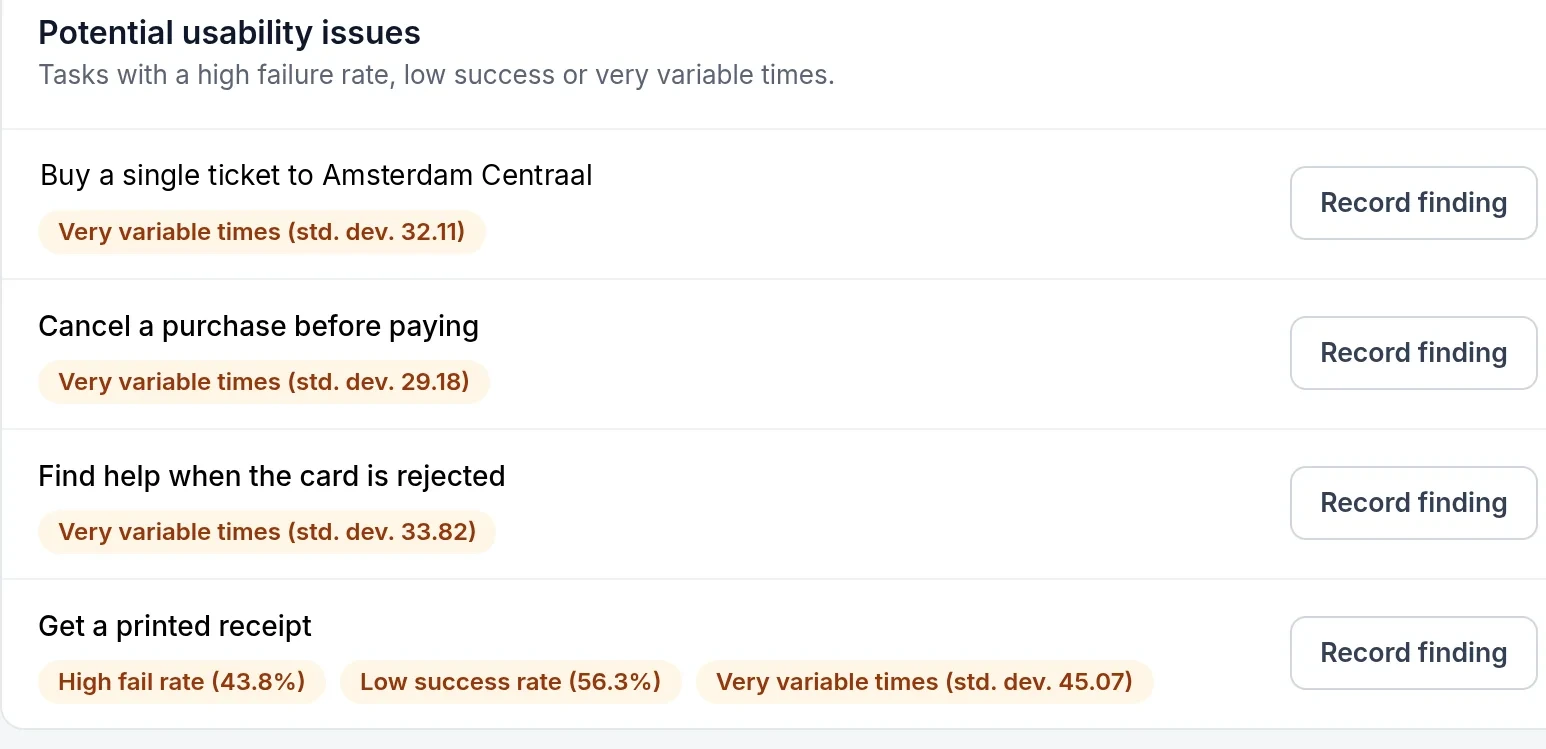
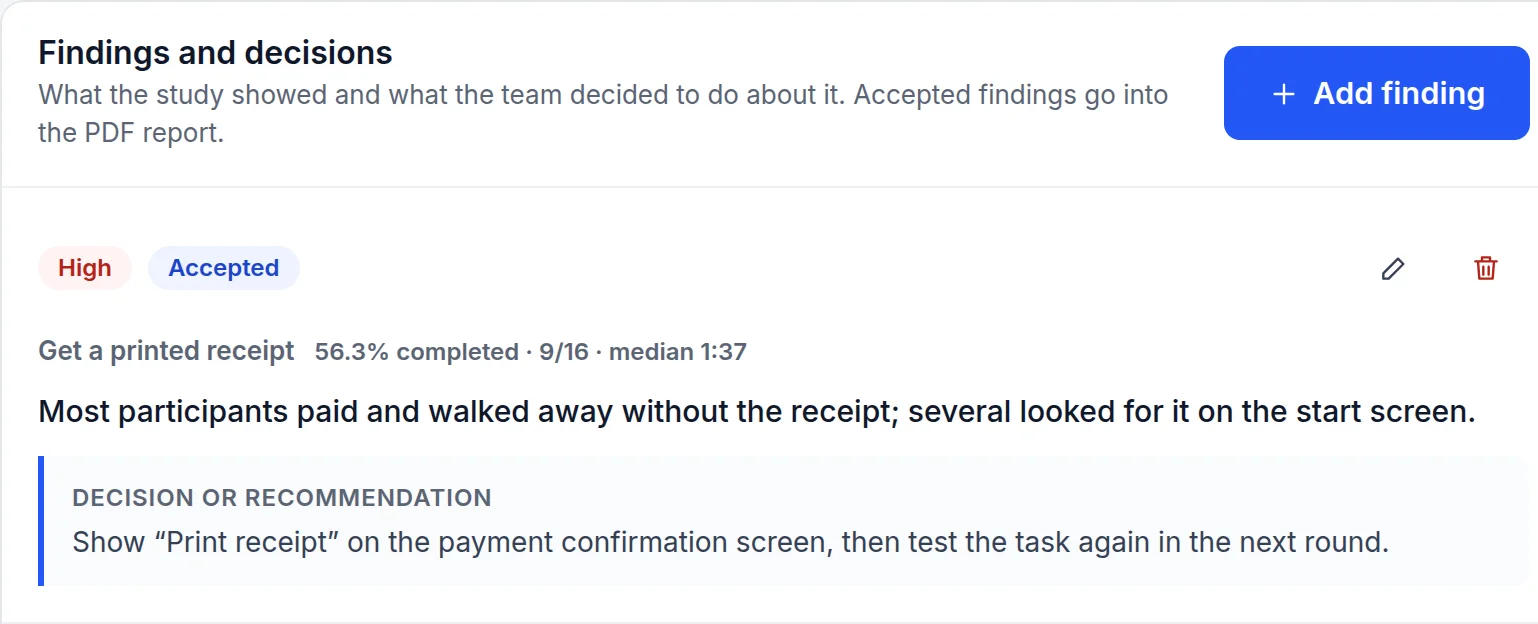
Results update as each session is saved. Flagged tasks point to likely problems, and AI can suggest findings from the results and notes. Your team checks each suggestion against the evidence and keeps, edits or discards it.
Next round
Record the decision for each finding, export the data or the report and change the design. Then duplicate the test for the next prototype and run it again to see whether the problem is gone.
Something people can actually use: a working prototype, a model, a pre-production sample or a clickable design.
A handful of people who match the users you have in mind, and their consent to take part.
The question the study has to answer, and what you will decide with the results.
A place, the equipment and the time for each session, as close as possible to how the product will really be used.
Your first study can be ready to run today.
What happens after you sign up